Desktop Computer Buying Guide: Pre-built vs. Custom PCs for Smart Buyers
Choosing between a pre-built PC and a custom build shapes cost, performance, and long-term ownership in concrete ways for gamers, creators, and general users. This guide explains what “pre-built” and “custom” mean, compares core attributes like warranty models, upgradeability, and out-of-box readiness, and gives practical steps to decide which route fits your needs. Many buyers face uncertainty about setup time, bloatware, component compatibility, and repair workflows; this article resolves those pain points with actionable comparisons, checklists, and simple cost tables. You will learn the key differences, pros and cons of pre-built systems, benefits and pitfalls of DIY builds, a concise cost analysis, and how maintenance and support affect total cost of ownership. Throughout, we weave in realistic post-purchase options — including when remote computer repair and optimization make sense — so you can choose a gaming desktop, workstation computer, or general-purpose desktop PC with confidence.
What Are the Key Differences Between Pre-built and Custom Desktop PCs?
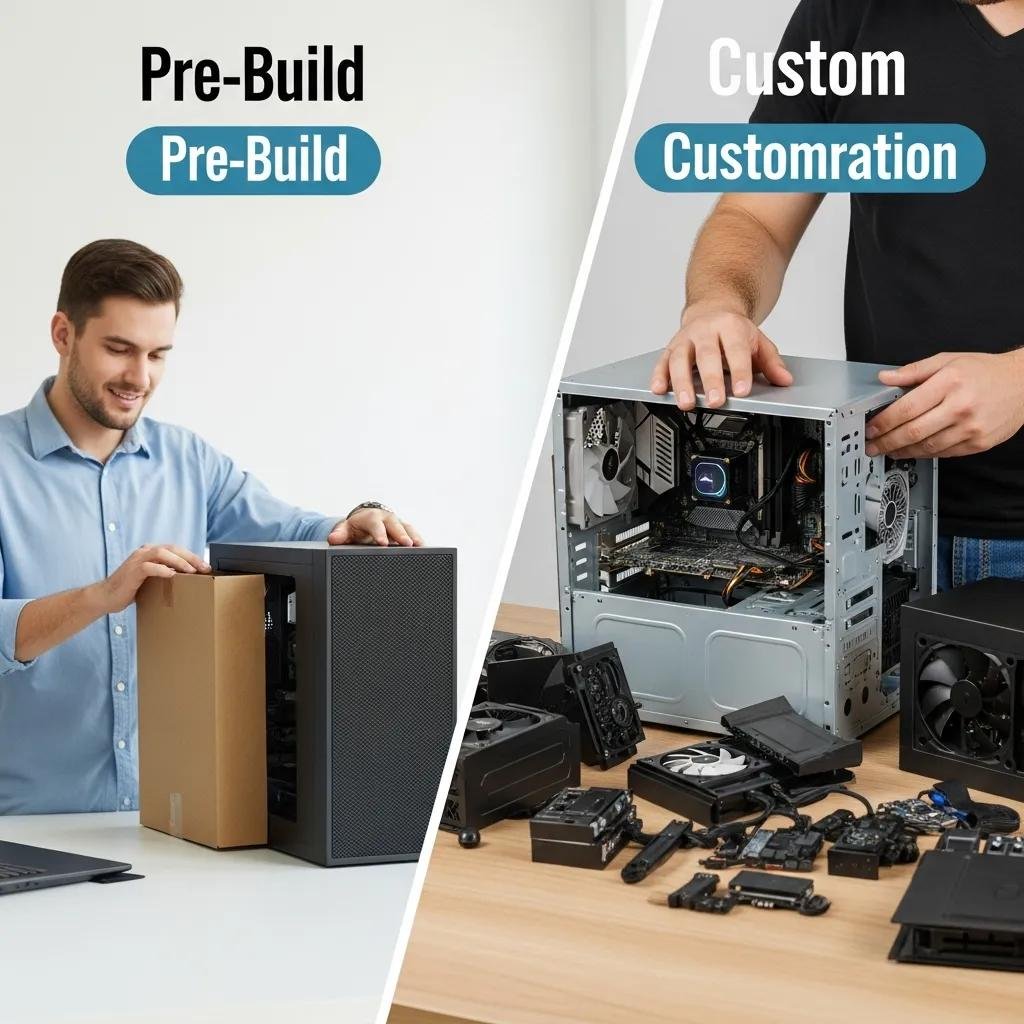
A pre-built PC is a factory-assembled system sold as a complete unit, while a custom PC is assembled from individual components chosen and installed by the buyer or a builder. Pre-built systems prioritize convenience, vendor-level system warranties, and fast out-of-box use, whereas custom builds prioritize component choice, upgrade flexibility, and often lower long-term upgrade costs. The practical result is a trade-off between immediate usability and tailored performance, and that trade-off affects maintenance and troubleshooting workflows. Below is a concise comparison to highlight the most meaningful distinctions before we move into setup and warranty specifics.
Key differences at a glance:
- Assembly & Setup: Pre-built — ready to use; Custom — requires build time and testing.
- Warranty Model: Pre-built — single system warranty; Custom — component-level warranties.
- Upgradeability: Pre-built — sometimes proprietary parts; Custom — standardized parts for easy upgrades.
This comparison leads naturally into how setup time and warranty differences influence first-week experience and long-term support options.
How Do Convenience and Assembly Requirements Compare?
Pre-built systems arrive assembled, tested, and generally configured with drivers and basic settings, so a user can start a gaming desktop or workstation computer within an hour of unboxing. Building a custom PC typically requires several hours for assembly, BIOS and driver setup, thermal testing, and cable management; beginners should reserve extra time to troubleshoot compatibility. The build process yields a deeper familiarity with components—CPU, GPU, RAM, SSD/NVMe, motherboard, PSU, and cooling—that helps with future upgrades and repairs. If you prefer minimal hands-on time, a pre-built reduces initial friction; if you want tailored performance and learning, a custom build offers that reward at the cost of time and effort.
These setup differences segue into warranty and support approaches, because how a system is serviced depends on who sold or built it.
What Are the Typical Warranty and Support Options?
OEM pre-built desktops commonly include a system-level warranty covering the complete unit and offer singular vendor support channels for diagnostics and RMA procedures, which simplifies claims but can limit component-level choices. Custom builds rely on individual component warranties — the GPU, CPU, and PSU each have separate coverage — meaning repairs often involve interacting with multiple manufacturers or returning specific parts. For post-purchase assistance, remote technical support can bridge gaps in troubleshooting steps and initial configuration. mcHelper.com, for example, operates as a remote computer repair and technical support service for Mac and Windows, offering remote troubleshooting, performance optimization, virus removal, and post-purchase support that complements OEM or component warranties.
Understanding warranty patterns highlights practical differences for buyers deciding between convenience and granular control.
What Are the Advantages and Disadvantages of Pre-built PCs?
Pre-built PCs offer immediate usability, consolidated support, and often bundled software or aesthetic options, but they can include pre-installed bloatware and sometimes proprietary components that hinder upgrades. This section outlines the main pros and cons to help buyers weigh short-term convenience against long-term flexibility and performance predictability.
Pre-built PC advantages:
- Fast setup: System arrives assembled and configured for immediate use.
- Single warranty and support: One vendor handles diagnostics and RMAs.
- Consistent testing: OEMs often run standard stress and compatibility tests.
Pre-built PC disadvantages:
- Bloatware risk: Pre-installed trial software can slow performance and raise security concerns.
- Proprietary parts: Some vendors use nonstandard front panels, PSUs, or motherboards.
- Less customization: Spec-level changes may be limited or costly.
These pros and cons lead into the kinds of pre-built specs that make sense for gaming and professional workloads in 2024.
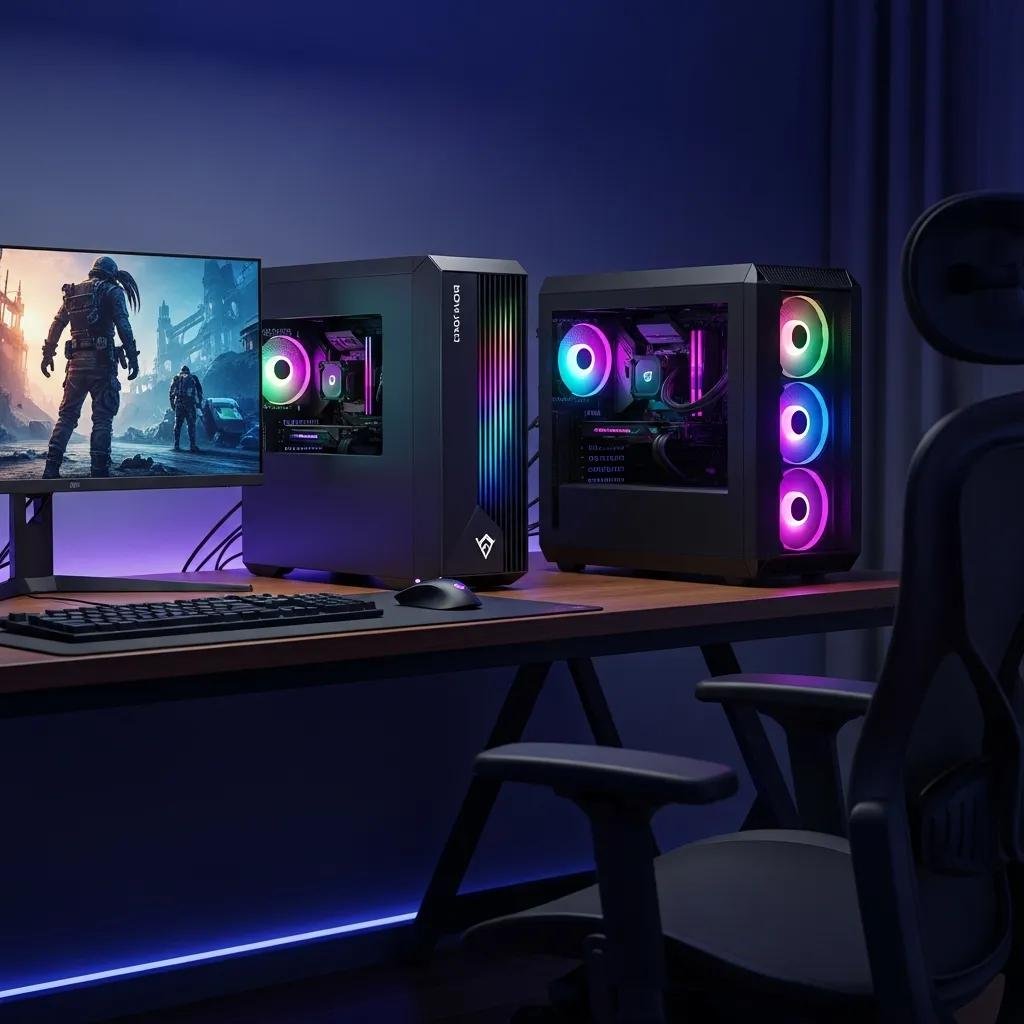
Which Pre-built PCs Are Best for Gaming and Professional Use in 2024?
For entry-level gaming desktops in 2024, target a modern mid-tier GPU, a 6–8 core CPU, 16 GB DDR5 RAM, and an NVMe SSD for responsive gameplay. Mid-range pre-built gaming PCs should include higher-core CPUs (8–12 cores), GPUs suitable for 1440p or 4K, 32 GB RAM for streaming, and 1 TB NVMe storage. High-end pre-built workstation computers for content creation prioritize many-core CPUs, professional-class GPUs or AI accelerators, ECC or larger RAM pools, and fast NVMe arrays for large project files. Choosing the right pre-built tier depends on whether you need GPU-heavy rendering, CPU-parallel workloads, or AI readiness, and each tier trades cost for headroom and future-proofing.
Specifying these tiers makes it easier to decide whether to accept OEM constraints or invest in a custom configuration next.
How Does Bloatware Affect Pre-built PC Performance and Security?
Bloatware refers to pre-installed third-party trials and utilities that consume storage, CPU cycles, and background services, which can degrade boot times and reduce available system resources. Beyond performance, some pre-installed utilities present privacy or security concerns if they run unnecessary background processes or request elevated permissions. Mitigation options include performing a clean OS install, using targeted removal tools, and disabling startup items to recover resources and tighten security posture. For buyers who prefer not to reinstall, remote support services can remove unwanted software safely and optimize startup settings without hardware changes.
If bloatware removal or performance tuning is needed after purchase, remote technical support is a practical next step for many users.
| System Type | Warranty Coverage | Bloatware Risk | Upgradeability |
|---|---|---|---|
| Pre-built | Single vendor/system warranty | Moderate; depends on OEM | Varies; some proprietary parts limit upgrades |
| Custom | Component-level warranties per part | Low; clean OS is typical | High; standardized components enable swaps |
| Boutique OEM | System warranty + limited customization | Low–Moderate | Medium; some customization but vendor constraints |
What Are the Benefits and Challenges of Building a Custom PC?
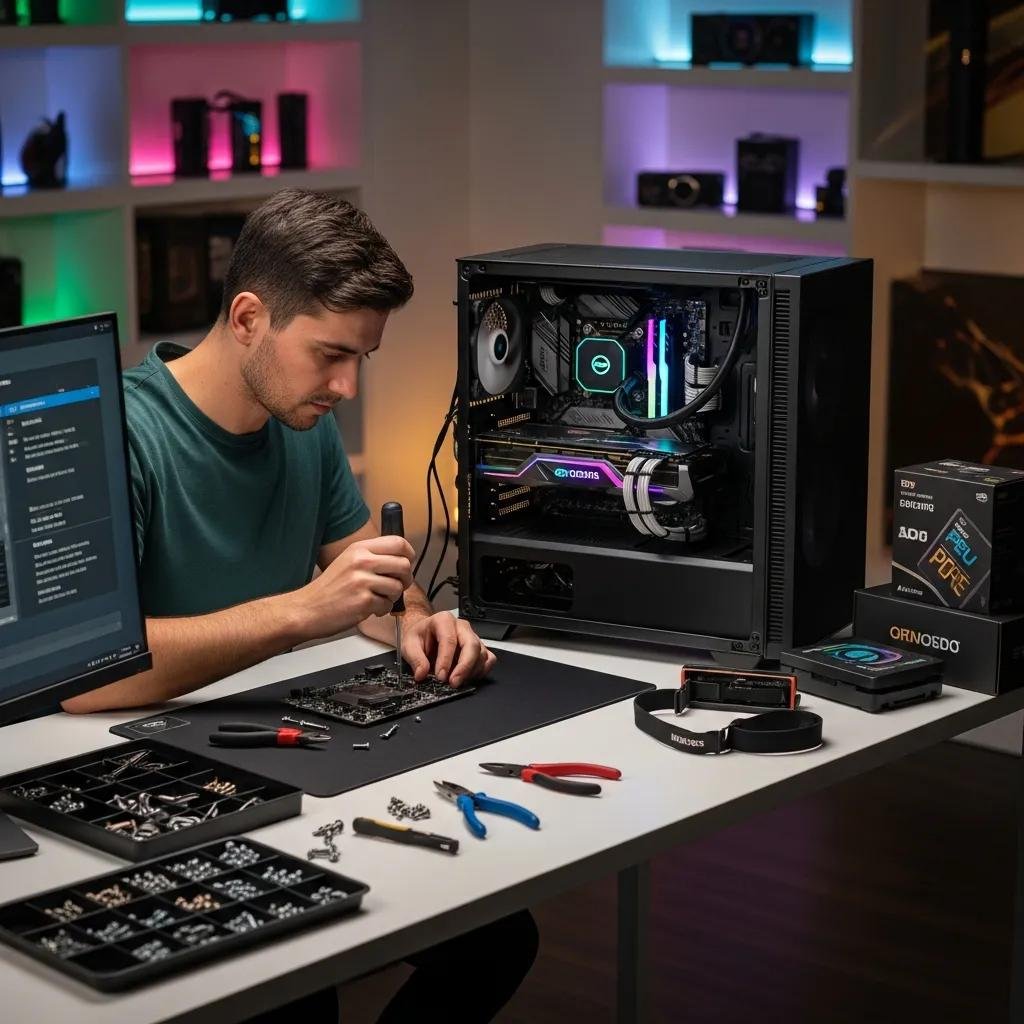
Custom PCs allow precise component selection, superior upgrade paths, and often better value-per-performance at each tier, but they require time for assembly, troubleshooting, and managing multiple warranties. Building your own desktop computer gives control over parts like the motherboard, PSU, and cooling, which directly affects reliability and future upgrades. However, responsibility for diagnosing hardware issues falls on the builder unless you use paid assembly or remote diagnostic services. The next subsection provides a compact compatibility checklist and selection guidance for gaming and workstation use.
How to Choose Components for a Custom Gaming or Workstation PC?
Selecting components begins with compatibility: confirm CPU socket and chipset match the motherboard, choose DDR5 or DDR4 RAM consistent with the board, and ensure the PSU provides sufficient wattage and the necessary PCIe connectors for the GPU. For gaming builds, prioritize GPU and single-core CPU performance; for workstations, prioritize multi-core CPUs, memory capacity, and storage throughput. Cooling strategy and case airflow affect thermal performance and longevity, while NVMe SSDs deliver the fastest load and project times. Use this checklist to reduce compatibility surprises and streamline testing after assembly.
A short actionable checklist follows to guide component selection and testing.
- Compatibility checklist: CPU & Motherboard: Confirm socket and chipset match.RAM Type & Capacity: Choose DDR5 vs DDR4 supported by the board.PSU Wattage & Connectors: Ensure headroom for GPU and future upgrades.Case & Cooling: Validate GPU clearance and airflow for thermal performance.
These compatibility checks reduce build-time troubleshooting and speed post-build validation.
What Is the Cost Analysis: Building vs. Buying a Desktop PC?
Short answer: building is often cheaper for equivalent performance at mid and high tiers, but pre-built systems can be competitive when factoring labor, bundled warranties, and time-to-use. Initial component prices vary by market conditions, but building allows selective spending on high-impact parts (GPU/CPU) while saving on case or peripheral costs. Hidden costs include potential RMA shipping, time spent troubleshooting, and software licenses; pre-built systems simplify those through integrated support and system-level RMAs.
The table below compares typical component costs and expected lifespan to make the breakeven points explicit.
| Component | Estimated Price Range | Estimated Lifespan / Upgrade Note |
|---|---|---|
| GPU | $250–$1,200+ | 3–5 years for gaming; upgrade sooner for higher framerates |
| CPU | $150–$700 | 4–6 years depending on workloads |
| RAM (32 GB DDR5) | $80–$200 | 4–8 years; upgrade for capacity needs |
| NVMe SSD (1 TB) | $70–$200 | 3–6 years; capacity upgrades common |
This table helps readers see where component upgrades drive long-term costs and when a pre-built warranty might offset DIY savings.
How Does Long-Term Maintenance and Support Impact Pre-built vs. Custom PCs?
Maintenance and support models shape total cost of ownership, particularly as parts age or when software issues arise. Custom builds benefit from standardized parts that make swaps and upgrades straightforward, but they rely on the owner to manage component RMAs and repairs. Pre-built systems simplify RMAs with single-vendor service but can impose delays and restrictions when proprietary parts are involved. Routine maintenance tasks — updates, thermal cleaning, malware scans, and driver upkeep — determine whether remote repair or local service is most efficient.
The table below shows typical issues and recommended repair paths to clarify decision-making for ongoing support.
| Typical Issue | Typical Repair Path | Typical Cost Estimate |
|---|---|---|
| Malware / OS corruption | Remote diagnosis and remediation; possible OS reinstall | Low–Moderate (remote) |
| Failed storage drive | Local replacement; data recovery may require specialist | Moderate–High |
| GPU or PSU failure | Component RMA (vendor) or replacement | Moderate–High |
| Overheating / thermal throttling | Cleaning, reapplying thermal paste, improved cooling | Low–Moderate |
Which PC Type Offers Better Upgradeability and Troubleshooting Ease?
Custom PCs typically provide the best upgradeability because they use industry-standard motherboards, PSUs, and drive bays that simplify part swaps. Troubleshooting in a custom system can be more direct because you can test or swap specific components, but the process requires hardware familiarity. Pre-built desktops may limit upgrades if vendors employ proprietary connectors, unusual PSU formats, or glued-in storage; however, vendor-provided diagnostics and system-level warranty support can reduce troubleshooting time for less technical owners. When planning for upgrades, prioritize standard form factors, modular PSUs, and widely supported motherboards to preserve future options and simplify troubleshooting steps.
When Should You Seek Professional Remote Computer Repair Services?
Remote computer repair is appropriate for software, OS-level, and many performance issues: malware removal, system optimization, driver conflicts, and network configuration are prime examples. If the symptom set includes slow boot, unexpected pop-ups, corrupted system files, or configuration errors, remote experts can diagnose and often remediate without hardware access. Hardware failures, physical damage, or data recovery from failed drives usually require local or specialist intervention; remote services can triage and advise on next steps. mcHelper.com exemplifies remote support offerings that include virus removal, performance optimization, data recovery triage, and a “no fix – no fee” promise, making remote troubleshooting a low-friction complement to warranty or local repair paths.
- When to call remote support: Malware or persistent pop-ups: Remote removal and cleanup is effective.Performance tuning: Optimization, driver, and startup cleanup are common remote tasks.Connectivity and email issues: Network and configuration problems can be fixed remotely.Data recovery triage: Initial diagnosis and safe steps can be guided remotely.
Remote support often reduces downtime and clarifies whether hardware replacement or an RMA is necessary, making it a practical option for many desktop owners.