Mac Activity Monitor Guide: How to Understand and Optimize Mac Performance
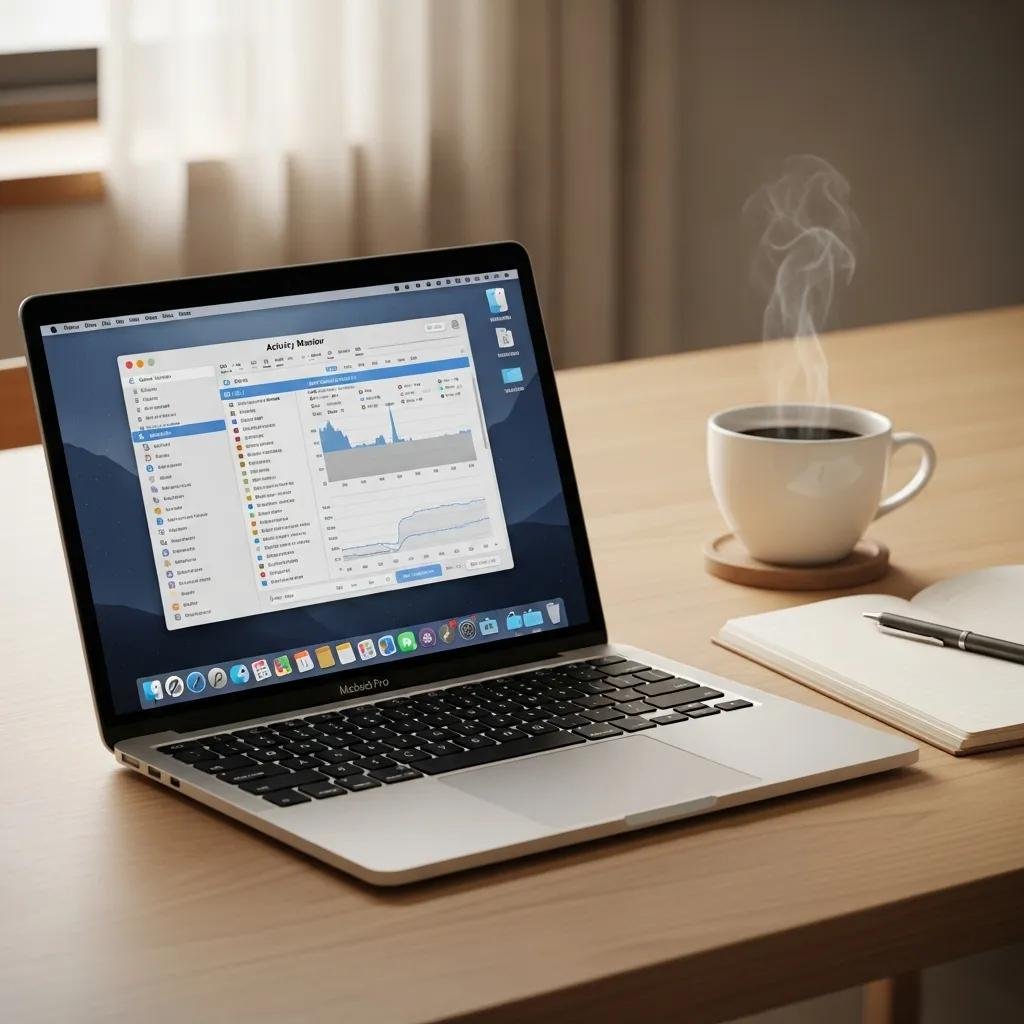
Activity Monitor is macOS’s built-in system monitoring tool that shows real-time resource use so you can diagnose and improve performance. This guide explains what Activity Monitor reports, why those metrics matter for macOS performance, and how to turn observations into targeted actions that reduce slowdowns and battery drain. Many users see a sluggish Mac but aren’t sure whether CPU, memory, disk I/O, or energy is the culprit; Activity Monitor reveals per-process CPU %, memory pressure, disk read/write rates, Energy Impact, and network activity so you can pinpoint the offender. You will learn how to open and navigate Activity Monitor, interpret the CPU and Memory tabs, spot persistent high-impact processes, and apply practical fixes such as quitting or updating apps, clearing caches, or addressing heavy disk usage. The article covers each major tab (CPU, Memory, Energy, Disk, Network), provides quick diagnostic steps, and supplies troubleshooting checklists and two compact EAV tables to use as a reference while you check mac processes and optimize mac apps. Read the step-by-step sections to move from detection to resolution with clear checks and actions.
What is Mac Activity Monitor and Why is it Important?
Activity Monitor is a system monitoring tool that reports how each process uses CPU, memory, disk, energy, and network resources, enabling fast diagnosis of performance problems. It works by sampling kernel and user-space metrics and presenting per-process metrics such as CPU % (per process), the memory pressure graph, Energy Impact column, and read/write bytes for disk I/O so you can decide what to close or investigate. Regular monitoring helps you prevent persistent swap, runaway daemons, or background indexing from degrading responsiveness and battery life. The quick reference table below maps the main Activity Monitor tabs to their primary metric and what each metric indicates for performance.
| Activity Monitor Tab | Primary Metric | What it Indicates |
|---|---|---|
| CPU | CPU % (per process) | How much processing time each app consumes; high sustained % suggests CPU-bound tasks |
| Memory | Memory pressure / RAM use | Whether RAM is sufficient; high pressure and swap indicate memory bottlenecks |
| Energy | Energy Impact / Prevents Sleep | Power-hungry apps draining battery or preventing sleep |
| Disk | Read/Write bytes and I/O | Heavy disk activity that can slow responsiveness, especially on HDDs or near-full SSDs |
| Network | Data sent/received | Apps using significant bandwidth or causing network latency |
Use this mapping to focus your checks and then learn the exact steps to identify problematic processes in the next section.
How does Activity Monitor track CPU and Memory usage?
The CPU tab reports each process’s CPU % and shows Total CPU and System vs. User time; a process’s CPU % is the share of CPU cycles it used during the sample interval. Activity Monitor also lists threads and can reveal whether a single-threaded app is pegging one core or a multithreaded process is using many cores, which helps differentiate normal workload (e.g., video rendering) from a stuck process. The Memory tab displays per-process memory, cached files, compressed memory, and a memory pressure graph that turns from green to yellow to red as available RAM becomes constrained and swap increases. Monitoring these UI elements lets you spot when swap or memory compression rises, a sign you should quit memory-heavy apps or restart the system to clear leaks before moving to more invasive fixes.
This understanding of CPU and memory metrics leads naturally to knowing which processes typically cause issues on macOS.
Which system processes affect Mac performance the most?
Certain categories of processes frequently account for slowdowns: heavy user apps like browsers and virtual machines, background daemons such as backup or indexing services, kernel_task behavior when thermals or I/O spikes occur, and unexpected app wakeups or helper tools. To identify them, sort by CPU % or Memory in Activity Monitor and inspect persistent top entries; the Process Name and PID reveal whether the task is user-launched or a system service. Watch for repeated spikes from a browser tab or an updater process, and differentiate short-lived CPU bursts from sustained consumption, since remedies differ for each case.
Identifying common offenders sets the stage for concrete steps you can take using Activity Monitor to resolve performance problems.
How to Use Mac Activity Monitor to Identify Performance Issues?

Activity Monitor is accessible from /Applications/Utilities or Spotlight and is organized into CPU, Memory, Energy, Disk, and Network tabs so you can isolate the dominant resource. Start by sorting processes by the column of concern (CPU %, Memory, Energy Impact, Bytes Written) and observe whether usage is transient or persistent, then record process names and PIDs before quitting or investigating further. Use the sample and inspect features to view threads, open files, and parent processes for deeper context, and run the checks below to produce an actionable diagnosis.
- Open Activity Monitor and choose the tab matching the symptom.
- Sort by the relevant column (CPU %, Memory, Energy Impact, Bytes Written).
- Note persistent top processes, their PIDs, and whether they are user or system processes.
- Use Force Quit only for stuck processes; investigate auto-launch agents for repeat offenders.
These steps explain where to click and what to note; next we’ll cover how to interpret CPU-specific numbers for targeted action.
How to interpret CPU usage in Activity Monitor?
Sorting by % CPU reveals which processes are consuming cycles; a brief spike is normal for tasks like exporting video, while a process sustaining high CPU over minutes signals an inefficiency or hang. If a single core is at 100% but overall CPU is moderate, it may be a single-threaded app; if Total CPU is high with multiple processes, system-wide load is elevated and may stem from background tasks. Immediate actions include pausing or quitting the app, checking for updates, or sampling the process to see which thread is busy; if the process is essential, investigate app settings or reinstall to resolve persistent misuse.
Interpreting CPU patterns helps you decide whether to force quit now or investigate further using memory and disk checks.
What does Memory pressure indicate and how to monitor it?
Memory pressure is a consolidated indicator that combines free RAM, cached files, compressed memory, and swap usage; green means ample RAM, yellow suggests pressure, and red signals that the system is thrashing and using swap frequently. Watch for high compressed memory and growing swapfile sizes—these are signs to quit memory-hungry apps, close unused browser tabs, or restart to clear leaks; on older Macs, adding physical RAM is a longer-term remedy. Regularly checking the memory pressure graph while reproducing the slowdown helps confirm whether memory is the root cause before pursuing disk cleanup or app updates.
Once you can identify memory pressure, apply targeted optimization steps described in the next H2 to reduce resource strain.
Use Mac Activity Monitor to Diagnose & Improve Performance
Use Activity Monitor findings to choose corrective actions: quit or force quit offending apps, update or reinstall problematic software, manage login items, and clear caches or temporary files to free disk and memory. Short-term responses include quitting resource-heavy apps and restarting to clear leaks; medium-term fixes include checking browser extensions and reducing startup items; long-term solutions involve freeing disk space, switching to an SSD, or adding RAM when possible. The troubleshooting mapping table below connects common problems to what Activity Monitor shows and the recommended action.
| Problem Detected | What Activity Monitor Shows | Action to Take |
|---|---|---|
| High CPU | Process with sustained high % CPU | Quit or sample process, update/reinstall app, check for runaway tasks |
| High Memory Pressure | Yellow/red graph, increased swap | Quit memory-heavy apps, restart, reduce browser tabs, consider RAM upgrade |
| High Disk Activity | High read/write bytes, long I/O waits | Close disk-heavy apps, free space, pause backups, check SSD health |
Refer to these mappings while performing the step-by-step troubleshooting flow below.
How to troubleshoot a slow Mac with Activity Monitor insights?
A concise troubleshooting flow helps move from detection to resolution: identify the dominant resource in Activity Monitor, sort and record offending processes, apply an immediate fix (quit or restart), and validate improvement by re-checking the relevant tab. For example, if a browser consumes large RAM and memory pressure improves after closing tabs, that confirms the fix; if not, sample the process or look for helper processes and reset app preferences. Documenting PIDs and changes ensures you can roll back or pursue deeper fixes like reinstalling apps or creating a clean user profile.
This flow gives a repeatable pattern so you can validate each step and escalate only when required.
Which apps or processes should you close to improve speed?
Prioritize quitting user-facing heavy apps such as web browsers with many tabs, virtual machines, design or video tools, and background utilities that consume CPU or RAM; temporarily suspend cloud sync, backup, or indexing jobs that spike disk I/O. Avoid terminating essential system processes (kernel_task, launchd, WindowServer) because killing them can destabilize macOS; instead, focus on user-space apps and noncritical helpers. After narrowing the offender, follow up with updates, preference resets, or uninstall/reinstall steps for persistent problems.
Knowing which processes to avoid and which to close prepares you to manage energy and disk usage proactively in the following section.
How to Monitor and Manage Energy and Disk Usage on Your Mac?

The Energy tab reports Energy Impact and shows which apps prevent sleep or cause sustained battery drain, while the Disk tab shows read/write bytes and I/O rates to identify processes stressing storage. Energy Impact is a composite score indicating relative power use; sort by that column to see power-hungry apps and consider quitting or updating those apps, enabling App Nap where available, or reducing background activity to extend battery life. For disk issues, identify high read/write processes, pause backups or indexing, and free space to reduce I/O contention and improve responsiveness.
These checks let you address battery life and storage-induced slowdowns before moving to device-level maintenance.
What does Energy Impact mean in Activity Monitor?
Energy Impact is a relative per-process score that estimates how much an app affects battery life and system energy, combining CPU, GPU, and I/O activity into a single figure you can sort by to find power-draining apps. If an app shows high Energy Impact or “Preventing Sleep,” quit or update it, reduce its background tasks, or enable App Nap to limit its activity when unfocused. For laptops, reducing screen brightness, disabling unused peripherals, and closing high-impact apps are immediate remedies to restore reasonable battery life.
Understanding Energy Impact helps prioritize which processes to limit when preserving battery and reducing thermal throttling.
How to check and reduce disk activity for better performance?
Use the Disk tab to sort by Bytes Written/Read to find processes with heavy I/O; common culprits include backup services, virtual machines, large file transfers, and indexing utilities. Immediate actions include pausing backups, stopping large transfers, clearing temporary files, and ensuring at least 10–20% free disk space on SSDs to maintain performance; longer-term steps include migrating to a faster SSD or trimming large unused files. Monitoring I/O while reproducing slow behavior confirms whether disk activity is the bottleneck and whether your interventions reduced read/write spikes.
By combining Energy and Disk checks with the earlier CPU and Memory diagnostics, you can comprehensively optimize macOS performance and keep your Mac responsive.